Thursday, December 19, 2013

This photo demonstrates a contrast in color, Jeff Hahn

This photo is an example of radial balance, Alex Brannan

This photo shows a contrat in texture, Timo Meyer

This photo shows a contrast in scale, Gabriele Caretti

This is an example of symmetrical balance, Versaweiss

Thursday, December 5, 2013

Project 3-Color and Grids

For this project we went into downtown Portland and took pictures of colorful things. Then I edited them where color and pattern are the main focus and put them into grids.


This is a 6x6 grid, using complimentary colors. Originally the photo was  of two blue garbage cans and a red brick wall. I changed it so they were bright blue with an orange wall, and purple cans with a yellow wall.

This 4x4 grid also using complimentary colors. The picture is of a  plastic statue that was originally green. I rotated the photos to make it look like an LSD trip. 

This is 3x3 grid of photos I shot downtown. They all have the same editing job of a turquoise tint and a light grain.

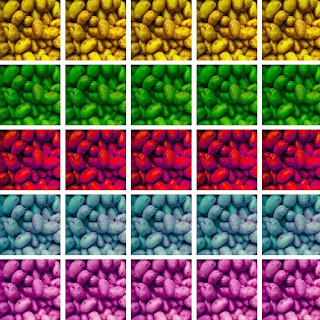
This is a 5x5 grid of the same shot of potatoes. I edited each row a different color to give it a rainbow effect.


I really enjoyed working with complimentary colors so I created an extra  6x6 grid of photos with complimentary colors. This photo was originally red and blue.

For this I took the 6x6 grid above and copied it 36 times to make another 6x6 grid. I didn't want to make it complimentary colors so I used blue, light blue, and violet to make it a "cool" picture. I think it could be used as a fabric design. 
This is a picture of some leaves on the sidewalk, I made the reds and yellows a little brighter to make the picture warmer.

Tuesday, November 19, 2013

Color Wheel

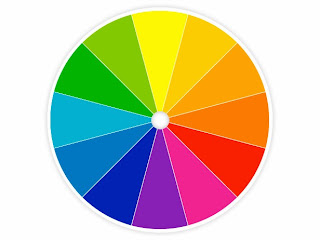
This is  color wheel, the primary colors are red, blue and yellow. The secondary colors are orange, green, and purple.

This picture gives the viewer a warm peaceful feeling. You get this feeling because the photographer used warm colors such as red, yellow, and orange. Those colors give the effect of a "warm" picture.

Thursday, October 31, 2013

Project 2-Framing and Composition

For this project, we experimented with eight different framing techniques. We went on two different field trips to downtown Portland and also to Washington park. We shot pictures using, rules of third, bug's eye view, bird's eye view, diagonals, filling the frame, leading lines, close ups, and frame within a frame.
Filling the Frame

Diagonals

Rules of third
Close up


Bug's eye view
Bird's eye view

Leading lines
Frame within a frame

Thursday, October 3, 2013

Project One 30 x 2

These are the final five pictures that I have taken and edited. My first subject was a flower outside of my school. My second subject was a water fountain also from school. The cigarette butt was next to the flower that was my first subject.

This is picture of a cigarette butt that was laying next to the flowers. I used the macro setting on my camera to really zoom in on the details of the cigarette. I tried mostly focusing mainly on the brick and the very tip of the butt so the rest would be out of focus. I then made the reds and oranges more saturated so they would pop. Finally I cropped the picture a bit so the cigarette was more to the side of the picture.
In this picture of a few leaves and a white flower, I once again used the macro setting on my camera to really get the details in the leaves. I them added a black and white filter. Then I used a colored brush and colored in the leaves different colors. I made the darks darker as well.

 This is the picture of the original white flower. I used a tungsten filter on this picture then I added a blue hue to it. I made it so that the petals were way darker compared to the very center of the flower. Originally I had a high grain effect on the picture but decided to remove it.
I used macro setting again and sepia filter. I then edited it by making it a little brighter because originally the whiteness was overpowering. I really like this picture because you can see the reflection of the wall in the button.

This photo was taken with a tungsten filter on my camera. Then I turned the water on and took the picture. I made the darks and shadows a little darker. I then added another filter. Then i had to once again change the shadows of the photo. I made it darker because it looks a lot better and because you can see the droplets of water better. I then cropped it. 

Monday, September 9, 2013

Canada

This summer I went to Canada. My family and I went to our old neighborhood and took a lot of pictures. We then went kayaking and took walks next to the water. It was a lot of fun.